


If you’re one of the thousands of Philadelphians who started a garden for the first time in the midst of the pandemic last summer, you already know: it’s life-giving. Taking care of plants relieves stress; it’s a real, live activity in a world of excess screen time; and you get to enjoy exceptionally tasty, fresh produce.
Growing even a small amount of the food you eat—and inspiring your friends and neighbors to do the same—can also help mitigate climate change.
MORE CITIZEN HOW-TO GUIDES TO KEEP YOU BUSY THIS SUMMER
Agriculture and forestry generate 24 percent of greenhouse gas emissions. Whether you can convert your lawn to a garden and grow enough to share, deck out your rooftop with pots and containers, or plant a few herbs to keep on your windowsill, you can make a difference by tending a small patch of earth sustainably. It’s a step towards self-reliance that will also help you eat more plants—crucial because the production of livestock generates the highest levels of greenhouse gas emissions of all food production.
But before we all start fantasizing about eating melons and tomatoes in August, a quick reality check: Growing food in the city is not easy. You’re battling the unpredictable elements all farmers deal with—pest pressure, weeds, deluges and droughts—plus limited space and limited time to tend to your crops.
“Try not to be too hard on yourself,” says Urban Tree Connection (UTC) lead farmer Nat Agoos. “There’s a never-ending amount of obstacles that can get in the way, but that’s part of the fun.”
We’re lucky here in Philly, because we’re home to organizations like UTC, run by folks who have long understood the importance of feeding ourselves and our community—and have been doing it.
They shared their hard-won knowledge to help you get a head start.
Keep reading for their spot-on tips on how to grow food in Philly, or skip ahead to one of these sections:
- How to properly assess your space
- Getting set up on patios, rooftops, windowsills and more
- What foods are best for gardens in Philly
- How to get started so your seedlings thrive
- How to get rid of weeds in your garden
- How to control urban pests like insects and squirrels
- Best ways to save seeds for future growing seasons
- Ideas for cooking with the foods you’ve grown
Assess your space
Be realistic up front about the space and conditions you’re working with. If you have outdoor space, is it largely exposed to sun and wind? Or is it shady? Is there water access nearby?
If you’re working with indoor space, do you have bright, south-facing windows your plants can sit in front of? How many windowsills do you have to cram full of pots?
“So much of growing anything is about regular observation,” says Meg DeBrito, director of nonprofit urban farm and garden center Greensgrow. “The act of figuring out how much sun you have, how you can get water to the site or if you’ll be relying on rain water, will help you select the right plants.”
If you have a hot, sunny environment, you might grow peppers, tomatoes, eggplant, beans, figs, basil and rosemary. (Philly’s heat island effect enables us to grow super hot weather crops like citrus.) For cooler, shady environments, you’ll have better luck with tender lettuces, spinach, and herbs like chives, mint, and parsley.

Get set up
No matter where you’re growing, you’ll need soil. You can get organic materials for free from the Fairmount Park Organic Recycling Center, or pick up at local shops like City Planter, Urban Jungle or Riverwards Produce. For larger-scale projects, order from Laurel Valley Soils in Chester County.
Here are some suggestions depending on the space you’re working with:
No outdoor access
You’re limited to the sunniest windowsills in your house. Get the most out of your space by growing high-flavor herbs like parsley, chives, oregano and thyme in pots with good drainage. If you have room for a shallow planter, lettuces and spinach work well in front of a window.
You can also grow nutrient-dense sprouts, like sunflower, radish, mung beans or classic alfalfa, on your countertop. You’ll just need a glass jar with a breathable covering (like cheese cloth or nylon secured with a rubber band).
Small balcony, flat rooftop, porch or concrete patch
You can fill up your space with pots, planters and containers.
“For outdoor planting we always recommend a container with good drainage—that way you plants won’t get waterlogged during a heavy rain,” says Susanne Collins, team member at City Planter, the Northern Liberties shop that carries plants, gardening tools and an array of containers.
If you’re setting up a rooftop garden, be sure to use heavy pots that won’t blow over and have a plan for frequent watering, Collins says. You can set up an irrigation system or start a morning (and afternoon on the hottest summer days) watering ritual.
You can also make your own containers: a five-gallon bucket with holes drilled through the bottom, a cardboard-lined milk crate or wooden fruit crate, and even the drawers of an unused dresser can be filled with soil and populated with plants. The key to DIY planters is to ensure they have good drainage and can stand up to consistent watering.
You have a yard!
Raised beds can be expensive to build and will break down over time, so if you can, it’s best to convert a patch of grass to garden.
First, get a soil test to make sure you don’t have high levels of lead or if it’s unsuitable for other reasons (high clay or sand content)—it costs just $10 to get a test from Penn State Extension.
“See if it’s healthy, and if it is, why not just grow in the ground? It’s there for you,” says Amanda Staples, who converted an abandoned half-acre plot to start Germantown Kitchen Garden, a farm stand and plant nursery that also supports a small CSA.
To kill the grass, you can solarize or smother your lawn—methods that take four to six months of mostly waiting. If you want to start planting right now, Staples recommends using a flat spade to cut your grass into squares so you can easily lift them out. Shake the dirt from the grass roots—you want to keep all that good topsoil in your garden—before composting or tossing to another patch of yard that could use extra green.
To loosen the soil, use a tiller (you can rent one) or get a pitchfork, shovel or broadfork and recruit friends to help. By-hand methods minimize soil disturbance, which keeps your soil healthy.
Pile on compost and mulch with straw, hay or shredded fall leaves to add extra organic matter.
Decide what to plant

You’ll want to plant things you’re excited about eating, and there are plenty of crops that are delicious and simple to grow. (Remember that planting isn’t just a spring activity—you can put new crops in the soil all the way through September.)
Staples recommends starting with salad mix—lettuces and greens that mature relatively quickly and can be harvested several times. “You could sow them every two weeks, and you’ll have a supply of salad throughout the whole season,” she says.
Spinach, peas and cooking greens like Swiss chard are relatively fast-growing and are better for you when they’re fresh, says Nate Kleinman, founder of the Experimental Farm Network and co-founder of the Community Gardens Commission. “Greens lose so many nutrients every day that they’re sitting in storage—whether in your fridge or at the supermarket,” Kleinman says.
Hardy greens like kale and collards aren’t fussy—they can tolerate heat and cold, you can plant them as early as you want and they’ll even last into winter (as long as you protect them from pests). And even one plant produces a lot of food.
“If I plant six kale, I can usually eat every week of the summer off of just those plants,” says DeBrito. She harvests about twice a week, taking only the largest leaves.
Tomatoes are a garden staple and do well in containers. Cherry varieties like sungolds will give you more fruit for your buck, and green zebras will stand a better chance against squirrels since they’re deceivingly green when ripe.
If you have the space (about a six-foot radius around the plant), Delaware Valley University plant scientist and professor Sarah Dohle recommends growing butternut squash. “It’s just miraculous,” she says, “You can pick the immature squash—they’re like firm zucchini—and cook them on the grill; you can eat the blossoms, and if you let the fruit get completely mature, it stores for a year!”
Gooseberries and red currants are good fruits to start with—they have relatively shallow roots and can be grown in containers. Figs flourish all over the city—check out the Philadelphia Orchard Project’s growing tips. If you have space for a fruit tree, Staples recommends Asian pears; they’re among the least disease-prone fruits we can grow in the area.
Start planting
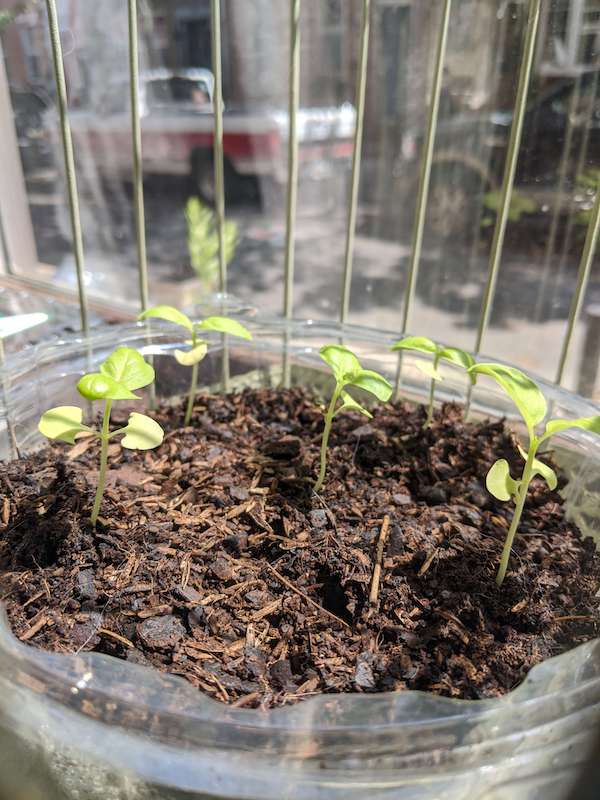
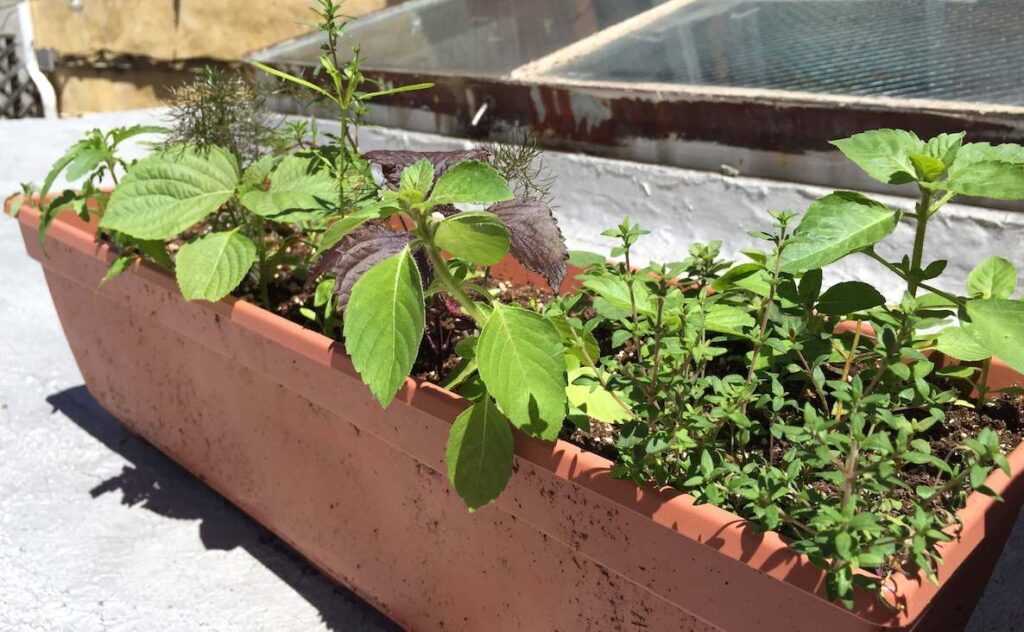
Photo: Brand new sprouts | Courtesy Aleicia Phulwani
Starting seeds indoors allow you to get a head start on the season and gives you access to a much wider variety of plants than what you can find at a nursery. You can get unique varieties from local seed savers like Happy Cat Farm, the Experimental Farm Network, and True Love Seeds.
If you—like most city gardeners—don’t have a greenhouse, a high tunnel, or indoor grow lights, you’ll want to find the sunniest window in the house, says True Love Seeds founder Owen Taylor. Start seeds in anything that has good drainage and will be easy to eventually transport outdoors; egg cartons or plastic takeout containers with holes cut through the bottom work well.
Use an organic seed starting medium like PRO-MIX. Water the soil and mix until it’s thoroughly wet but not soggy. “It should be like a wrung-out sponge,” Taylor says. Most seed packets will provide spacing and depth instructions, but Taylor has a helpful rule of thumb: plant the seeds about twice as deep as the seed is large.
Some seeds can take more than two weeks to germinate. (If you’re impatient, plant seeds in the cabbage family—like kale, mustard greens, and napa cabbage.) Once you have seedlings, they’ll need as much light as you can give them. Keep them in that sunny window and gradually introduce them to direct sunlight outside as they grow.
If you’re short on time, or would prefer not to bother with the seeding process, just purchase plant starts from folks who already did all that hard work of sprouting and maintaining fragile seedlings. Greensgrow, Germantown Kitchen Garden and Well-Sweep Herb Farm offer lots of varieties.
Note that some seeds are better off planted directly in the spot where they’ll live until harvest—called “direct seeding”—like carrots, beets, radishes and beans.
Prevent weeds
One plus about growing in window boxes, pots and planters: fewer weeds to deal with. In these small spaces, it’s manageable to pull weeds as they pop up.
 If you’re growing in the ground, try to prevent weeds from taking hold in your garden in the first place—but not by spraying any chemicals that would damage your soil and contaminate the crops you plan on eating.
“My goal with weeding is to never bend over,” says Adrian Galbraith-Paul, farmer at Heritage Farm. He uses a standing collinear hoe to kill weeds when they’re still in the thread stage. “It’s almost like sweeping the soil,” Galbraith-Paul says. You can uproot weed by scraping just the top inch of the soil—take care not to disturb deeper, as you’ll bring more weed seeds to the surface to germinate.
Prevent weeds by mulching with shredded leaves or straw, placing a thick layer on the bed immediately after you’ve planted. Cardboard or paper bags with holes cut to allow your plants to grow through work well, too.
Keep wood chips in the pathways between your rows of crops, Galbraith-Paul says; though they’re an effective weed suppressant, they can rob your soil of the nitrogen your plants need to thrive.
Get rid of pests and disease
Small mammals, insects, and even pathogens want to feed off of that good stuff you’re growing, too—so no matter where you’re growing, you’re going to implement some protection.
Pathogens
 For microscopic pests—diseases caused by bacteria and fungi—air flow between plants is critical for prevention, says plant scientist Sarah Dohle. “Pathogens are spread through moisture and touch,” Dohle says, “You want to harvest when the plants are dry to avoid spreading any diseases to other plants.”
Give your plants plenty of space and water soil directly at the base of the plant to avoid getting water on the leaves. And next year, rotate what gets planted where in your garden; different plants attract different families of pathogens, which can stay dormant in the soil over the winter and take hold again in the spring.
Insects
For super small bugs like flea beetles, which go after brassicas like cabbage, kale and broccoli, and nightshades like tomatoes and peppers, try fine mesh insect netting. “You want to put it on immediately after you plant your seeds, because as soon as they come up, those bugs will find them,” Staples says. To keep the netting above the soil, put metal half-hoops over your bed or build a structure using a half-inch PVC pipe bent over your bed anchored by two rebar posts.
Small mammals

The easiest way to keep rabbits, squirrels, moles and groundhogs away from your crops is to get a dog.
Not possible? Put up a fence. Dohle recommends using t-posts and chicken wire—just be sure to bury the chicken wire at least a foot into the soil to keep out animals that burrow.
Squirrels are the main culprit of urban planter damage. You can deter them by spraying a super hot pepper concoction on and around your plants—which may or may not work depending on how desperate the squirrels who share your habitat are. (If you try this, remember to rinse your harvest well as mouth-burning capsicum oils can linger.)
You can also create a fortress around young plants by cutting out the bottom of the plastic pot that held your plant and burying it part way in the soil around the plant, protecting the tender stem.
Save seeds for next year
Why save seeds? Because from one seed, you just grew hundreds! And with a little patience and care, you can have a head start for next season and save on your gardening costs. Plus, plants adapt to their growing environments, so if you select the healthiest plants to save seeds from year after year, they will continue to get better at growing in your yard.
True Love Seed’s Taylor recommends starting with tomatoes and peppers because the seeds are ripe at the same time that the fruit we eat is ripe (except green and purple peppers). When you’re cutting up your pepper, you can set aside the seeds, lay them out on a paper bag or newspaper and let dry away from direct sunlight for two weeks
Tomato seeds need to ferment to break down their seed coat, after which you can spread the seeds out to dry.
For many other crops, you just have to wait. “A lot of plants get these hard, dry seed pods—like beans, peas, okra, and anything in the cabbage family,” says Taylor. When the seed pods are totally dry, they’re ripe for you to pick (you’ll know when the birds start pecking at them).
Store your seeds in glass jars with tight fitting lids in a cool, dry place. You can check out the seed keeping notes for each variety offered by True Love Seeds to learn more.
Eat what you sow
Growing your own food also gives you access to ingredients you can’t buy in a store, or even at the farmers market. You’ll get to taste different parts of your plants at different stages—like the sweet-spicy flowers of arugula, tender radish pods, green tomatoes, and fresh coriander.
And just-picked food that you grew yourself will taste good—and its prime flavor and freshness can be enjoyed simply.
Greensgrow and Soulfire Farm have great recipes and tips. To delve deeper, check out these books:
How to Pick a Peach by Russ Parsons
Afro-Vegan by Bryant Terry